Sitecore JSS with Next.js - Adding a Placeholder
In this article, I will explain step-by-step how to add a placeholder to a component in a Sitecore JSS with Next.js solution.
Create and configure the Placeholder Settings
-
Under
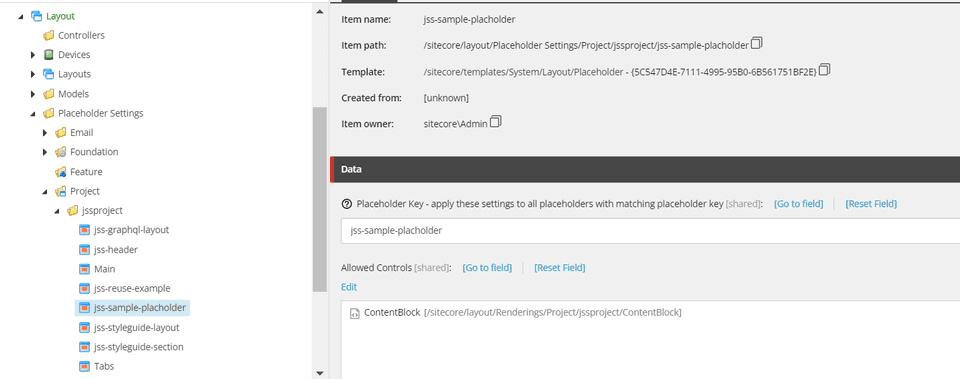
/sitecore/layout/Placeholder Settings/Project/<project-name>, Add a Placeholder Settings Item with the Placeholder Key as the name of the placeholder. You can add the required components to the Allowed Controls. -
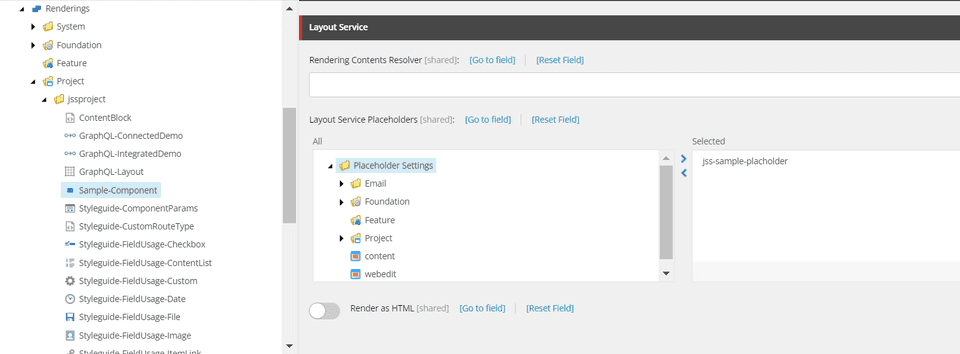
Now, go to the rendering item of the component where you need this placeholder and add the placeholder to the Layout Service Placeholders field.
-
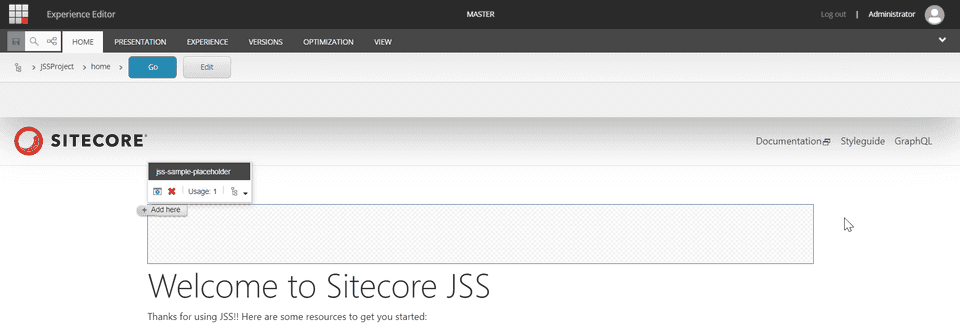
Open the page with your component in Experience Editor to observe the changes made in your front-end.
Add the Placeholder in the Next.js solution
-
Open your project in Visual Studio Code.
-
Go to the component definition in the Next.js solution, at path
src\rendering\src\components\<component-name>.tsx. -
Import the Placeholder component from @sitecore-jss/sitecore-jss-nextjs, if not already imported.
-
Add the below line to your component definition with the Placeholder name as the key used earlier.
<Placeholder name="jss-sample-placeholder" rendering={props.rendering} /> -
Your component definition should look somewhat like below:
import { Text, Field, withDatasourceCheck, RichText, Placeholder } from '@sitecore-jss/sitecore-jss-nextjs'; import { ComponentProps } from 'lib/component-props'; type SampleComponentProps = ComponentProps & { fields: { title: Field<string>; description: Field<string>; }; }; const SampleComponent = (props: SampleComponentProps): JSX.Element => ( <div> <Text field={props.fields.title} /> <RichText field={props.fields.description} /> // Below is the added Placeholder <Placeholder name="jss-sample-placeholder" rendering={props.rendering} /> </div> ); export default withDatasourceCheck()<SampleComponentProps>(SampleComponent); -
Your Experience Editor should now refresh and load the added placeholder.
-
Ensure that the Placeholder Key used earlier and the name attribute of the Placeholder component is exactly the same. Otherwise, you may see an error in the Experience Editor.
-
Now, we need to add the placeholder to the component definition for the disconnected manifest. So, open the
<component-name>.sitecore.tsfile, and add the placeholder attribute. The file should look as below now.// eslint-disable-next-line no-unused-vars import { CommonFieldTypes, SitecoreIcon, Manifest } from '@sitecore-jss/sitecore-jss-dev-tools'; /** * Adds the SampleComponent component to the disconnected manifest. * This function is invoked by convention (*.sitecore.ts) when 'jss manifest' is run. * @param {Manifest} manifest Manifest instance to add components to */ export default function SampleComponent(manifest: Manifest): void { manifest.addComponent({ name: 'Sample-Component', icon: SitecoreIcon.DocumentTag, fields: [ { name: 'title', type: CommonFieldTypes.SingleLineText }, { name: 'description', type: CommonFieldTypes.RichText }, ], // Below is the placeholder added to the component placeholders: ["jss-sample-placeholder"] /* If the component implementation uses <Placeholder> or withPlaceholder to expose a placeholder, register it here, or components added to that placeholder will not be returned by Sitecore: placeholders: ['exposed-placeholder-name'] */ }); } -
The Placeholder is now successfully configured.
Happy Sitecoring!


