XM Cloud - Getting Started
Introduction
XM Cloud is Sitecore’s cloud-native, SaaS enterprise-ready CMS that creates content once and delivers across any channel for unforgettable customer experiences.
- Sitecore
XM Cloud is the next advanced step towards composable DXP. With the variety of products Sitecore offers, we can build lightning-fast headless websites with functionalities we can plug in as needed. XM Cloud enables us to utilize the best that Sitecore has to offer, without having to maintain the infrastructure.
Also, imagine Sitecore upgrades being a simple software update. Yes, Sitecore will update your instances for your XM Cloud instances.
Sitecore Cloud
The Sitecore Cloud Portal is the central hub to access all Sitecore DXP apps. From the portal, you can manage access to apps such as XM Cloud, Headless CMS, and the XM Cloud Deploy App.
XM Cloud Deploy App
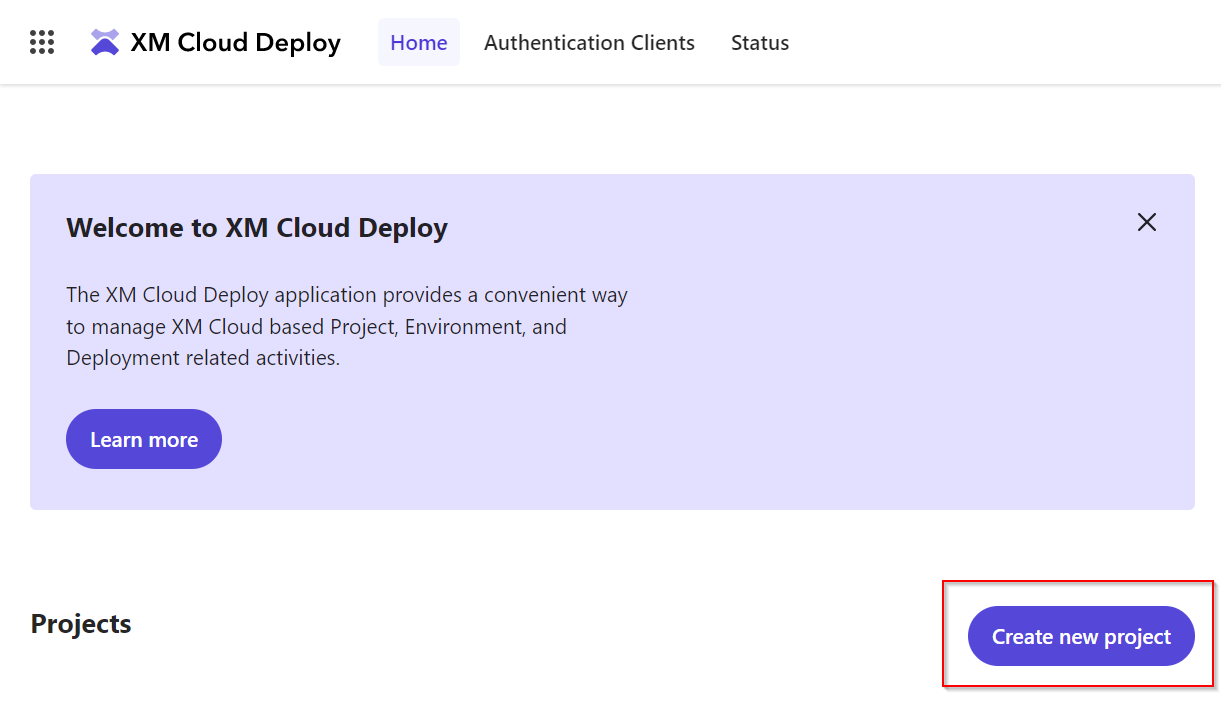
From the XM Cloud Deploy App, you can create an XM Cloud project using a starter template or using your existing code and manage projects, environments, and deployments.
You can also use the XM Cloud Deploy App to view, create, and revoke authentication clients.
Steps to create your XM Cloud instance
Go to the Sitecore cloud portal at https://portal.sitecorecloud.io/.
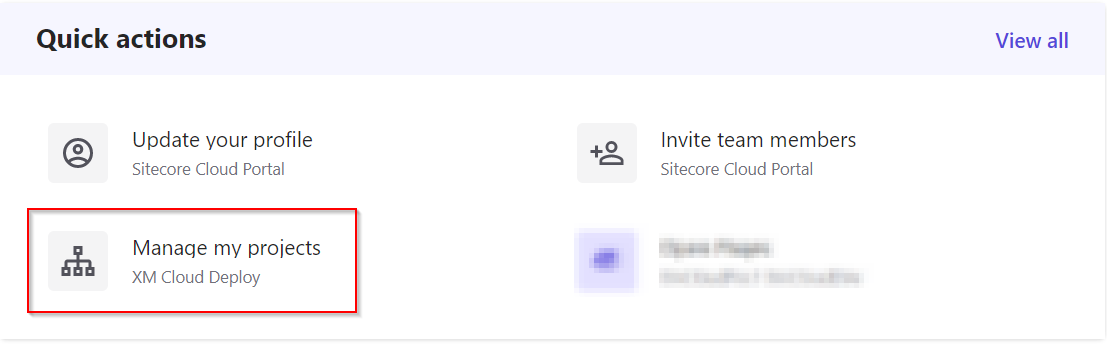
Go to the XM Cloud Deploy App by clicking on Manage my Projects, or use the link: https://deploy.sitecorecloud.io/
In the XM Cloud Deploy app, create a new project. (or use an existing project, as needed)
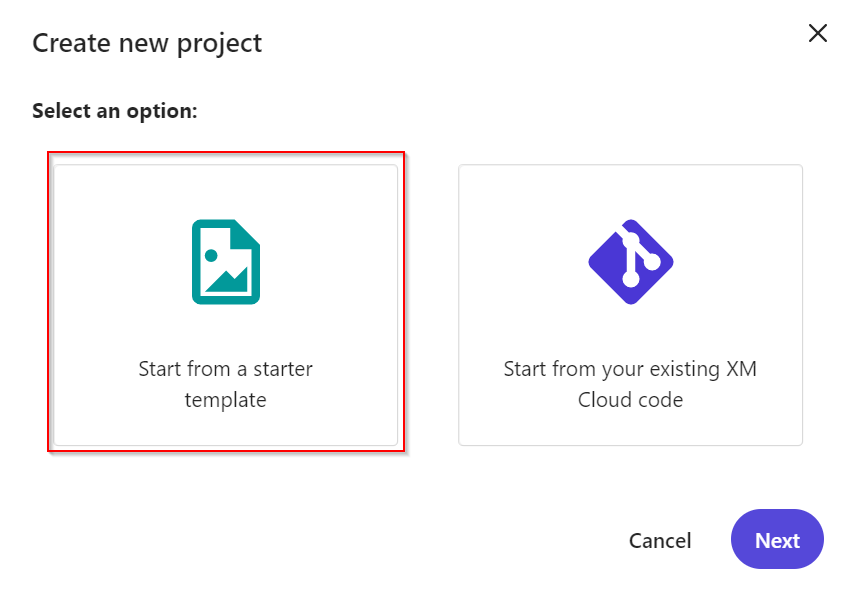
Now, you can either choose to use your existing XM Cloud code or start from a Starter template. I will be using the Starter template for the example. Select 'Start from a starter template' and click 'Next'.
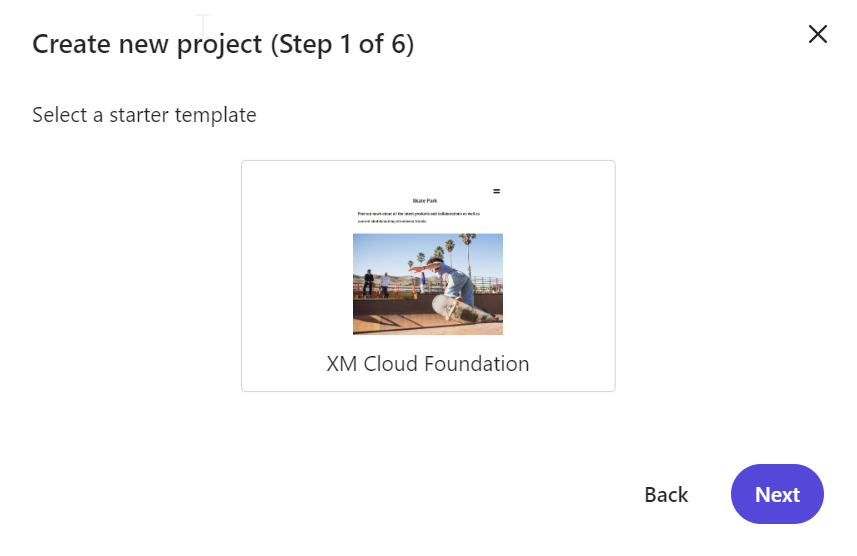
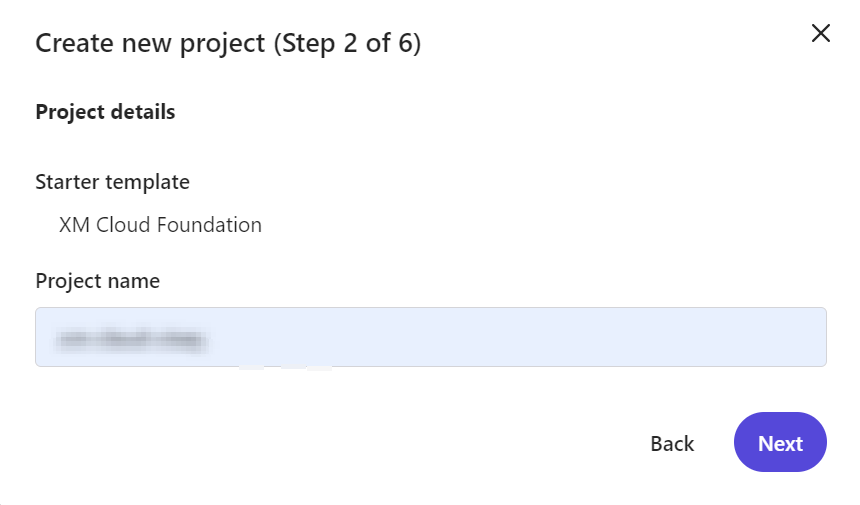
Select 'XM Cloud Foundation', which is the only starter template available now. Maybe we can expect more templates from Sitecore in the future.
Give a name for your XM Cloud project.
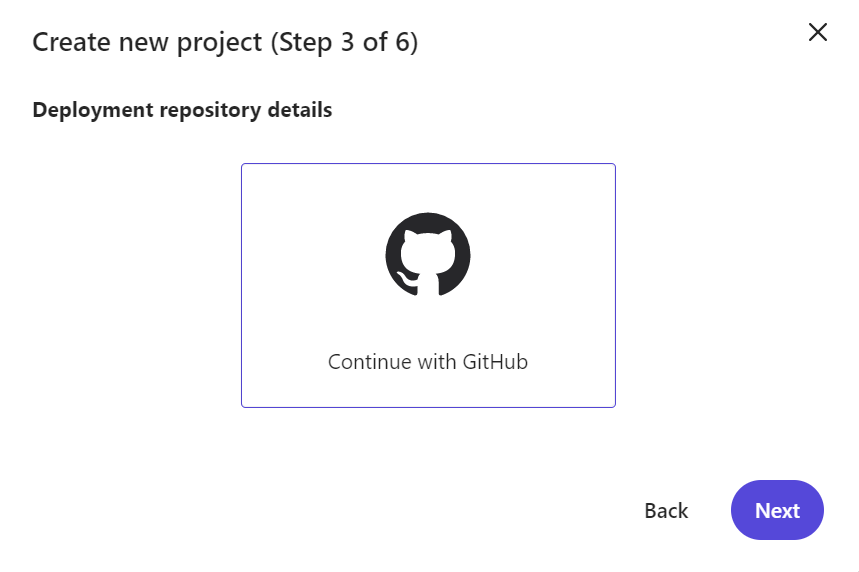
Select 'GitHub' as your deployment repository. GitHub is the only repository available for now. Sitecore may add more options in the future.
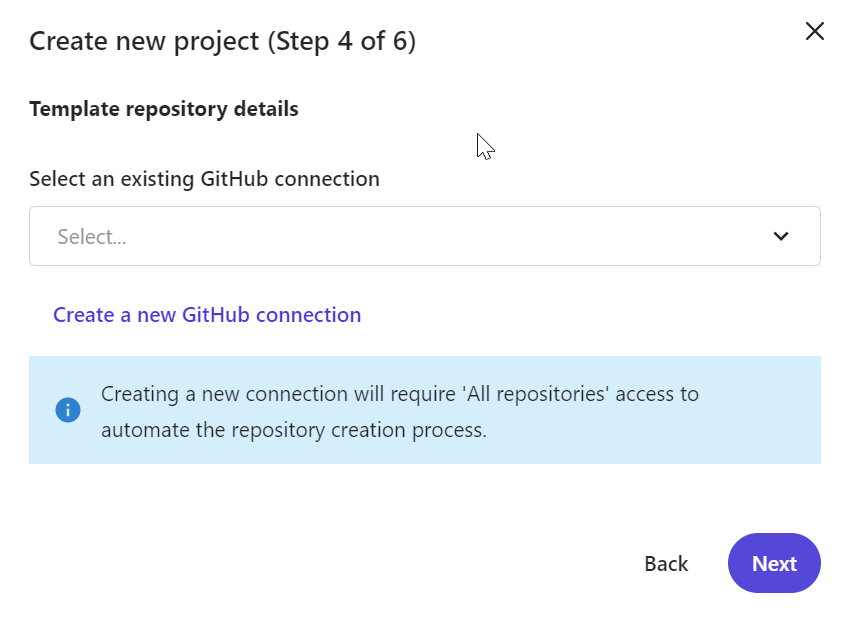
You can select an existing GitHub connection, or create a new one. Remember to provide access to All repositories, when creating a new connection as this is necessary for XM Cloud to create a new project on your GitHub.
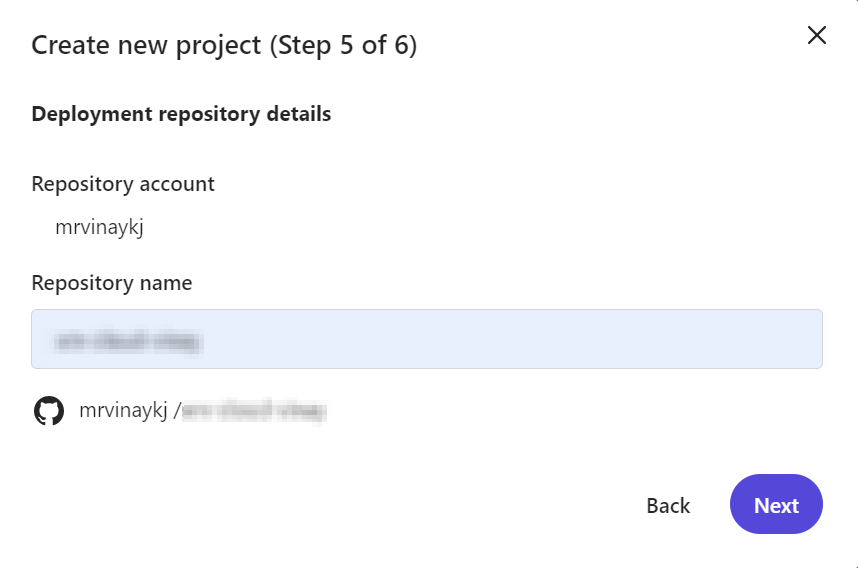
Provide a name for your GitHub repository.
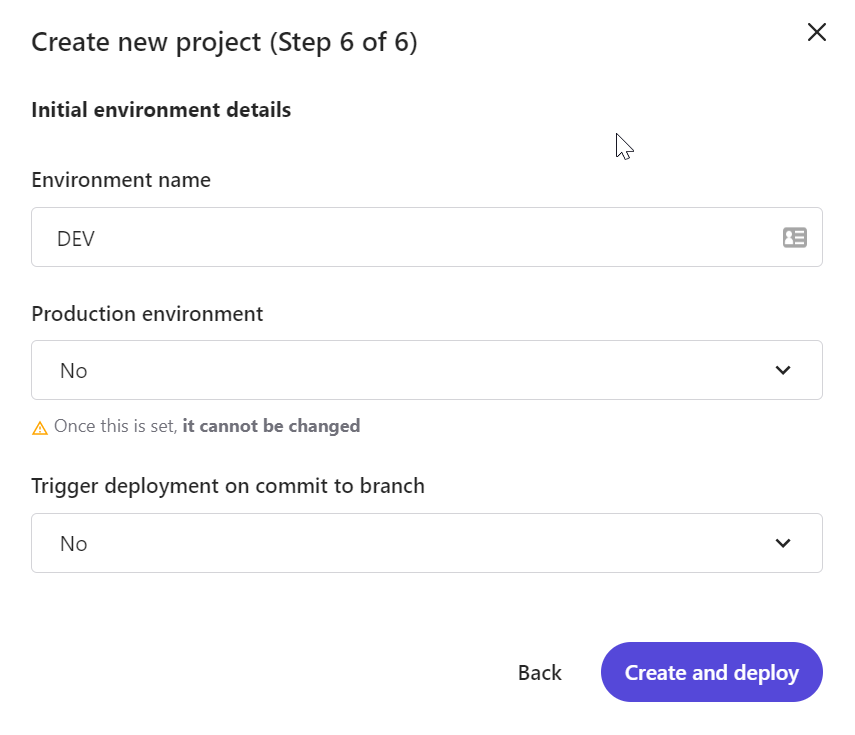
Provide the Initial environment details, and click on Create and deploy.
Now, your deployment will start. The Provisioning and Build steps will run parallelly.
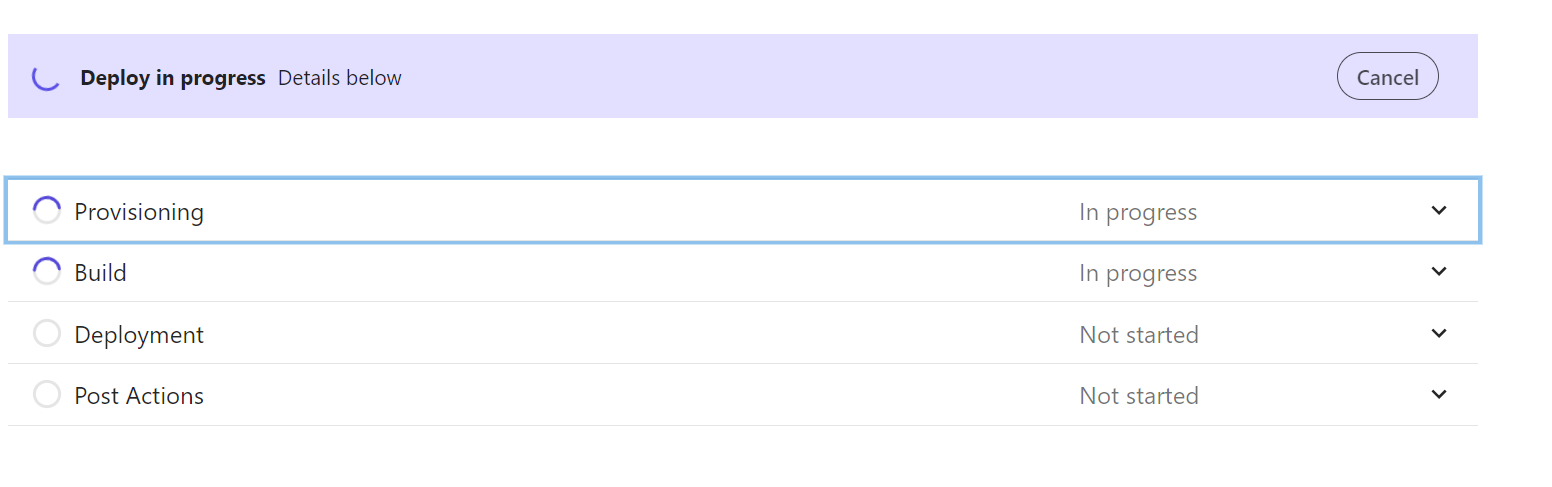
The Provisioning step will:
Create the Master, Web and Core databases.
Configure Unified Identity.
Setup Experience Edge.
Configure the Master, Web, Core and Horizon indexes.
The Build step will build the solution in the starter template.
The Deployment step will deploy your solution to the XM Cloud instance.
P.S. The XM Cloud team has some great G.O.T fans. :D
The Post Actions step warms up the CM, populates the schema, and rebuilds your indexes. This step seems to be something we can configure for our own purposes.
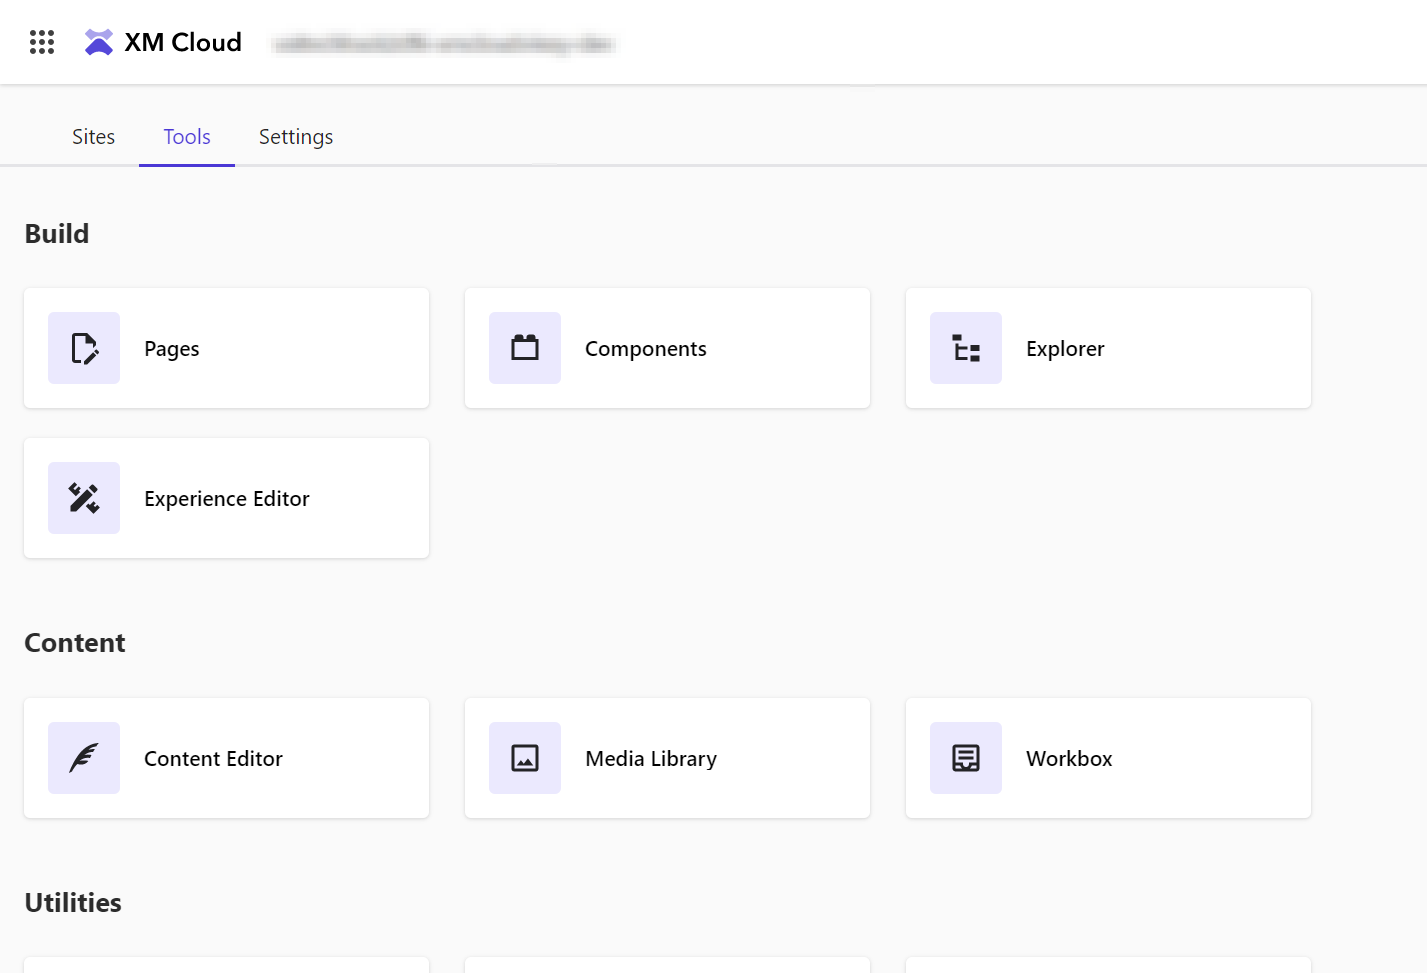
Voila! Your XM Cloud instance is now up.
You can access it by clicking on the Launchpad link.

This will open your XM Cloud Launchpad.
Happy Sitecoring!!